Why Patio Planning Matters More Than the Pour
Homeowners often fixate on surface materials and color palettes long before addressing the structural decisions that actually determine whether a patio succeeds or fails. Skipping the planning phase leads to cramped layouts, drainage nightmares, and budget overruns that could have been avoided entirely. A well designed patio does more than look attractive. It reshapes how a household uses its outdoor space across every season.
Raleigh residents benefit from a climate that supports outdoor living roughly eight to ten months each year, making a thoughtfully designed patio one of the highest value improvements available. The planning process outlined below walks through seven essential steps that ensure your finished space functions beautifully and holds up for decades.
Step 1: Clarify Your Lifestyle Goals First
Every design decision flows from a single starting point: understanding precisely how you intend to use the space. Grab a notebook and write down the activities you picture happening on your patio over the next five to ten years.
A retired couple who enjoys quiet morning coffee and reading needs entirely different spatial proportions than a family that hosts large gatherings every other weekend. Think about which features genuinely match your daily habits rather than chasing trends that may not serve your routine.
The most popular features our project teams encounter include the following:
- Outdoor Kitchens: Industry data from 2026 shows outdoor kitchens returning 1.5 to 3.0 times their cost at resale, making them a strong long term investment.
- Pizza Ovens: More than half of surveyed design professionals in 2025 ranked the pizza oven as the single most requested outdoor cooking feature.
- Fire Pits: Conversation areas anchored by a fire pit work best when placed on a slightly lower elevation, separated from the main structure of the home.
- Raised Planters: Incorporating planter beds along hardscape edges softens the overall visual impact and adds seasonal color.
Flexibility deserves attention as well. Young families may prioritize open sight lines from the patio to the yard, while those approaching retirement should consider gentle ramp transitions instead of steps.
Step 2: Evaluate Site Conditions and Underground Constraints
Your property has characteristics that will either support or complicate your design, and discovering them early prevents costly surprises during construction.
Drainage and Soil Behavior
Walk the yard after a heavy rainstorm and note where water collects or flows. Wake County’s red clay soil drains poorly, so standing water becomes a persistent problem without proper grading. French drains, channel drains, or stepped elevations may be necessary depending on the severity.
Water must always flow away from the home foundation. Mark any low spots or soggy zones during your initial walkthrough because these areas will dictate the grading strategy your contractor follows.
Sun Exposure and Existing Landscape
Observe your yard at multiple times throughout the day. Morning shade can vanish by early afternoon, leaving a seating area exposed to brutal summer heat. Mature trees provide valuable natural shade, though root systems and leaf debris need to be factored into placement decisions. If natural shade is limited, plan for pergolas or shade sail anchors from the start.
Utilities and Regulatory Requirements
Underground lines for gas, water, electric, and cable restrict where you can excavate. Call 811 to have public utility lines marked before finalizing any layout dimensions. Many neighborhoods in the Raleigh area also have HOA covenants that specify setback distances, height restrictions, and approved materials. Reviewing these rules early avoids expensive redesigns.
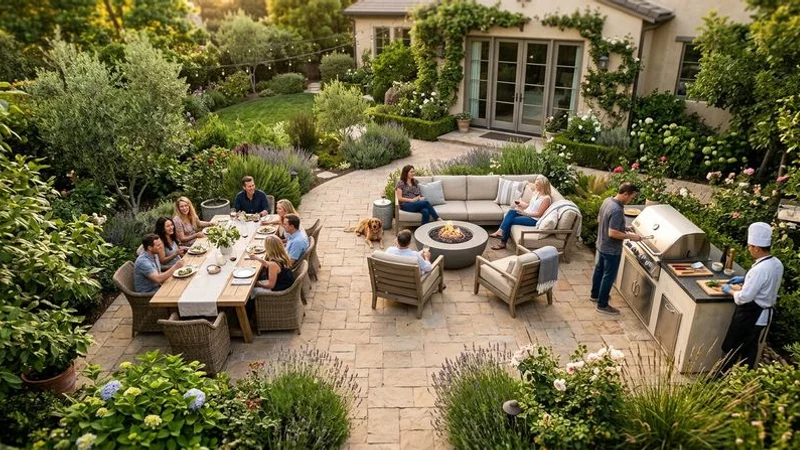
Step 3: Size Your Space Generously
Undersizing remains the most common planning error homeowners make. A layout that appears spacious on graph paper often feels cramped the moment furniture arrives.
| Primary Activity | Minimum Recommended Size | Ideal Space Allocation |
|---|---|---|
| Dining (6 people) | 12 x 12 feet | 14 x 14 feet (allows walking behind) |
| Lounge Area | 12 x 14 feet | Fits sofa, two chairs, and coffee table |
| Fire Pit Circle | 14-foot diameter | 16-foot diameter (safe distance) |
| Basic Grill Station | 8 x 10 feet | Includes grill and small prep area |
For cooking zones, NKBA guidelines recommend 100 to 400 square feet for standard outdoor setups. A full outdoor kitchen with multiple appliances typically requires a minimum of 12 by 16 feet.
Always allow at least 24 inches of uninterrupted counter space for food preparation and maintain 36 inches of clear walkway width around grills and hot surfaces.
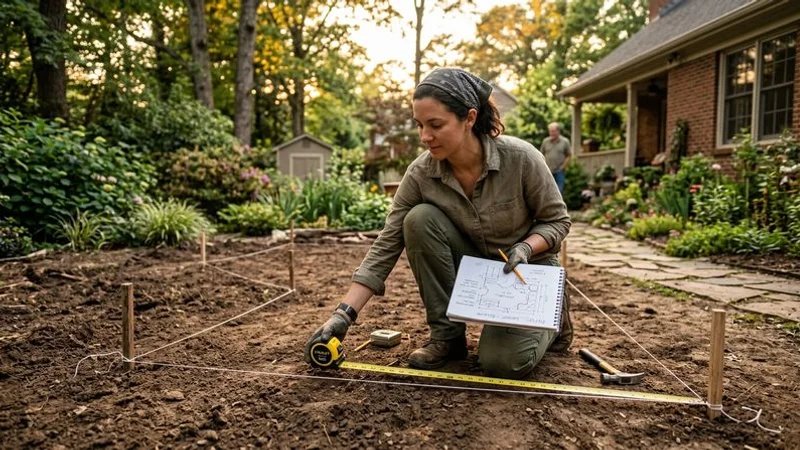
The simplest way to test proposed dimensions is to stake out the footprint in your yard using painters tape or garden hoses. Place your existing furniture inside the outline and physically walk the space. Carry a tray from the back door to the seating area to reveal circulation problems that remain invisible on a blueprint.
Step 4: Select a Layout That Complements Your Home
The shape of your patio should harmonize with the architectural lines of your house and the natural contours of your property.
Geometric layouts with clean rectangular or square edges pair well with traditional and colonial home styles. Extending a rectangular surface from large sliding doors creates a seamless indoor to outdoor transition. Nearly half of design experts surveyed in 2025 identified pocket sliding doors as the preferred method for connecting these two spaces.
Curved and organic shapes integrate naturally into backyards with mature landscaping, wooded lots, or irregular property boundaries. This approach aligns with the growing interest in biophilic design, where hardscape and softscape blend together using fragmented live edges that feel native to the environment.
Multi-level designs transform sloped terrain into a dramatic feature rather than an obstacle. An upper dining terrace connected to the house can step down to a lower fire pit lounge, with retaining walls between levels doubling as built-in seating. L-shaped configurations are another strong option, separating a cooking zone off the kitchen from a relaxation area off the living room.
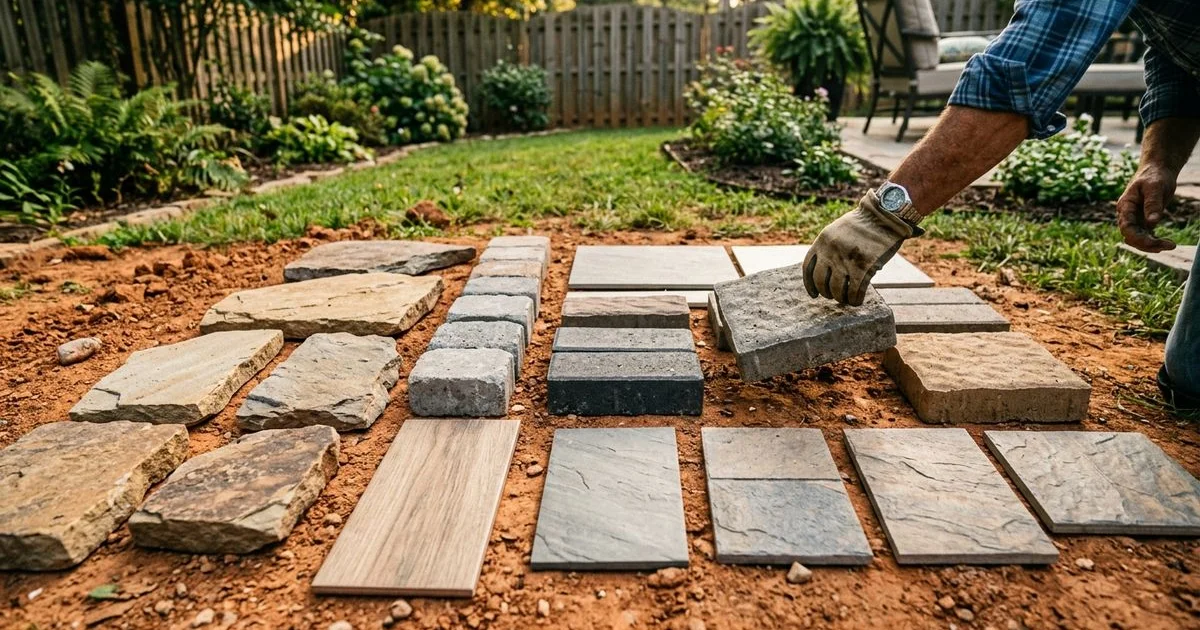
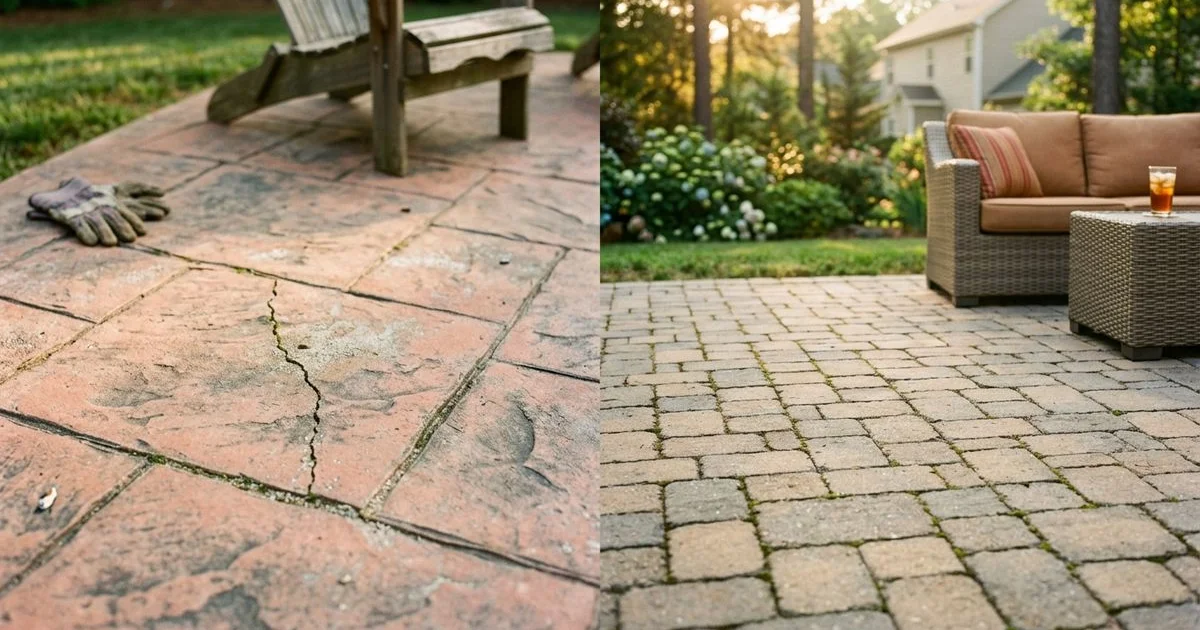
Step 5: Choose Materials That Perform in Your Climate
With dimensions and layout established, turn your attention to surface materials. Every option involves tradeoffs between appearance, maintenance demands, and total cost.
- Concrete Pavers: Typical installations range from $23 to $50 or more per square foot depending on site complexity. Individual pavers can be replaced if one cracks, making long term maintenance straightforward.
- Travertine: Natural stone that stays remarkably cool underfoot, even during the hottest Triangle area summers.
- Porcelain Pavers: Highly resistant to algae and mold growth, which is a significant advantage in humid climates.
Our detailed guide to the best patio materials for North Carolina covers additional options and regional performance data.
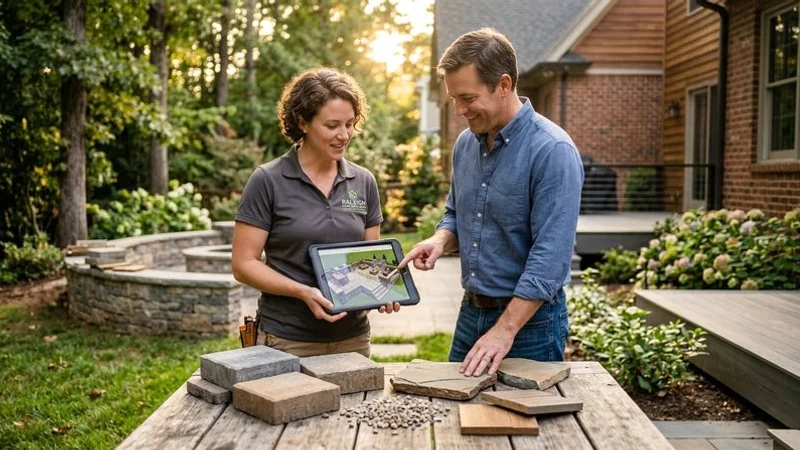
Bring physical samples home and view them alongside your siding, trim, and existing hardscape elements in both sunlight and shade. A material that looks perfect in a showroom may clash outdoors. Choosing a surface that complements existing stone walls or walkways creates immediate visual cohesion and gives you flexibility to add features like a fire pit in a future phase.
Step 6: Map All Utility Needs Before Breaking Ground
Retrofitting electrical, gas, or plumbing lines after a patio surface is installed creates enormous disruption and expense. Every feature that requires power, fuel, or water must be mapped during the design phase.
Pro Tip: Never pour concrete or compact base gravel until all local utility inspections for buried lines have officially passed.
Lighting turns a daytime patio into an evening retreat. Plan for a combination of ambient string lights, recessed step lights, and focused task lighting near cooking surfaces. Low voltage LED landscape systems integrate into the base preparation with minimal visible wiring.
Gas lines for fire features or permanent grills must be run by a licensed plumber through a trench at least 18 inches deep. This work needs to be completed and inspected before base gravel is compacted.
Electrical outlets near seating areas power blenders, speakers, and outdoor fans. All exterior outlets require GFCI protection per the National Electrical Code. Planning outlet locations early allows conduit to run beneath the surface cleanly.
Irrigation adjustments are almost always necessary because a new hardscape footprint alters natural drainage patterns and disrupts existing sprinkler zones.
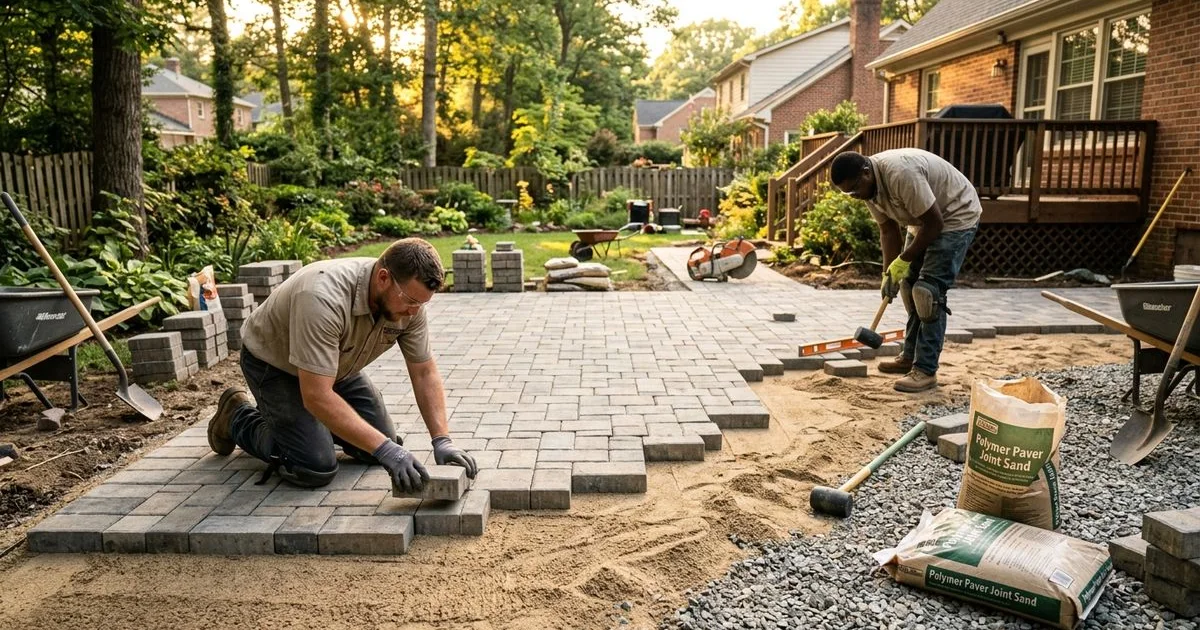
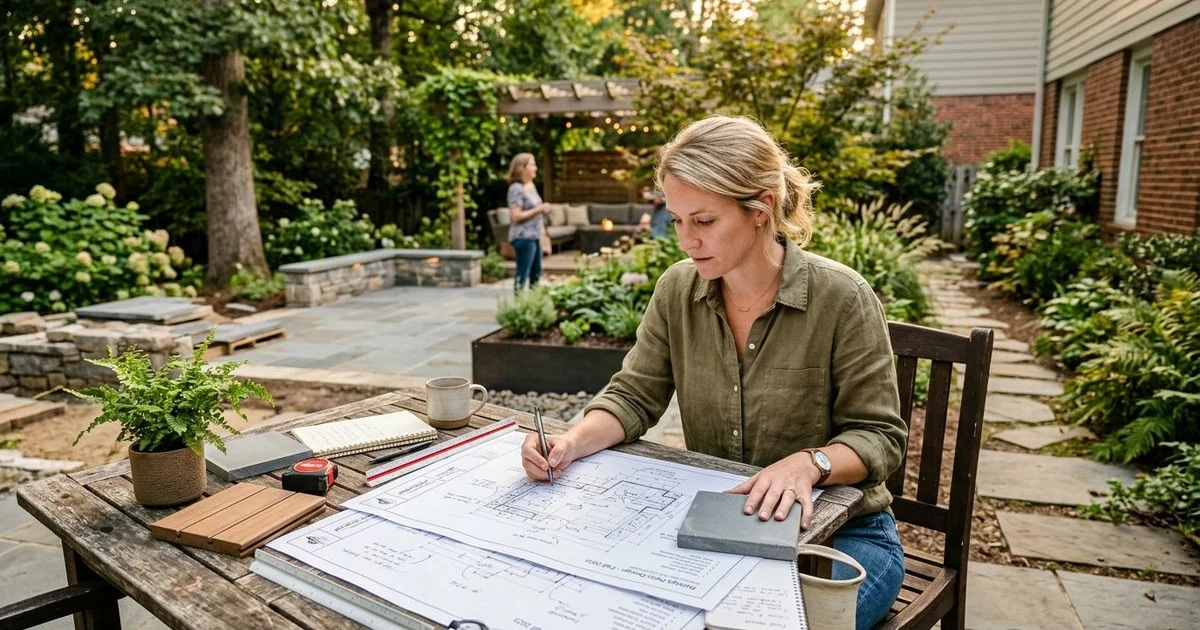
Step 7: Partner With a Qualified Contractor
The first six steps produce a detailed brief that puts you in a strong negotiating position. An experienced hardscape contractor adds deep knowledge of local building codes, drainage engineering, and construction techniques that elevate a good plan into a lasting asset.
Verify credentials before signing any contract. Teams holding an Interlocking Concrete Pavement Institute (ICPI) certification demonstrate proven competence in base preparation and compaction standards. The Concrete Masonry and Hardscapes Association (CMHA) 2025 Contractor Industry Report highlights ongoing workforce shortages nationwide, which means top tier installers book months in advance. Starting conversations early is essential.
When meeting a prospective builder, share your wish list, budget range, and any drainage concerns about your property. Ask to see portfolios of completed projects and request references from past clients.
Obtain at least three detailed written proposals and compare them across these critical specifications:
- Depth and type of base material
- Specific brands and quality of surface pavers
- Proposed drainage solutions
- Length and coverage details of the warranty
The lowest bid almost always omits critical structural steps. Investing in proper planning and quality installation pays dividends for the entire lifespan of the patio.
Start Building Your Outdoor Vision
Designing a backyard patio is equal parts creative expression and structural discipline. Working through these seven steps means you arrive at your first contractor meeting with a clear vision, realistic expectations, and the knowledge to evaluate proposals confidently.
Hardscapes Raleigh connects homeowners with vetted patio designers and builders who understand the unique soil, climate, and permitting requirements of the Triangle area.
Reach out for a free design consultation and take the first step toward the outdoor space you have been picturing. A qualified professional will walk your property, discuss your goals, and develop a custom layout built to deliver exactly the results you want.